Thursday, September 30, 2010

Drawing: part 1

Drawing is one of my favorite past times. Occasionally I get a commission here and there and I always enjoy the challenge of making a drawing look just like the picture it's supposed to. 

Art is a very subjective field and it definitely takes time, patience, and practice to achieve perfection (which, in reality, is never truly achieved). But drawing is a basic skill that almost anyone can learn. I am going to take you step-by-step through a typical drawing for me. I hope you find this helpful if you ever feel the desire to make a drawing for yourself.

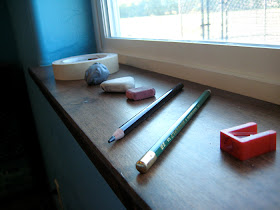
First, you will need basic drawing supplies. This is what I typically use.


-Two pencils: one with a hard graphite for initial outlining (I use 4H), and a soft graphite for shading (I use a jet black ebony pencil).
**many people think it is necessary to have a variety of pencils, which may be true if you are in need of other effects in your drawing, but these are the only two pencils I ever use**

-A sharpener
-Variety of erasers
-Masking tape (to keep your paper in place while working)


When drawing faces, I often used a grid for accuracy. I will show you that method in this demonstration. First, lay a grid over the photo you are working from. In this case, I have enlarged the photo to focus on the face more, and I have also turned it black and white so I could see the tone variations rather than color...since we are working in black and white medium.


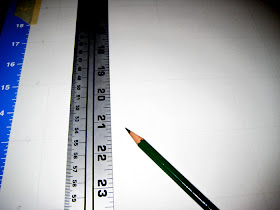
Next, lay out your grid on your paper with a yard stick or ruler and a very light pencil line.


Then, VERY lightly start the outline of your drawing. Follow the natural contours you see. Each shape has an edge, and that is where you make your line. Even the shadows can be formed into shapes, so make sure to outline where they will go as well. Use your grid to see where each line meets another, and to help gauge size and shape of your objects.


It may not look like much yet, but you're on your way to making a beautiful drawing!

Remember, the key is PATIENCE! That's the hardest part for me. 


Now go make something, and enjoy the day!


Wednesday, September 29, 2010

Photo Editing


I love taking photos. The thrill of capturing a moment in time is like catching fireflies for me: you must be quick and careful and contemplate your strategy before you take your shot. Unfortunately, my photo-taking abilities are not always up to par. But there is help! Photoshop. Ohhh how I love Photoshop. 

Editing software allows me to create the look I intended but may not have achieved initially when I snapped that photo. It's a beautiful thing.

Today I had the fortunate opportunity to edit some already beautiful photos. These were all taken by a lovely friend of mine who has a knack for capturing those once in a lifetime moments with her camera. You can see more of her wonderful work here.

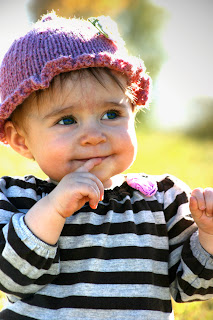
She took these gorgeous fall pictures of my little girl last week and sent me the disks to do with them as I pleased (yes, she is that awesome). So here are some examples of what I did.

The top is the original and the bottom is edited. Can you see the difference? It's subtle, but sometimes the smallest change makes the biggest difference. All I did here was brighten the face to define the features better. Easy? Yes. Happy? Very.


Again, subtle lighting changes to brighten the photo, but this time I tweaked the saturation a bit. I think she looks like a little angel in this one. Original on left, edited on right.


In this one, I lightened the photo and really cranked up the saturation to give it these really warm hues and a bright pop of color.


In this next photo, I added a lighting filter. I added a spotlight to the picture to draw the focus more to her face, and in this one I actually DE-saturated the colors a little to give it more of a muted look.  Original on left, edited on right.


And in this final photo (which happens to be my favorite) I really muted the tones by desaturating the picture. I also added a spotlight filter to dim the edges oh so slightly and light up her pretty little eyes.


Overall, I am soooo satisfied with the little work I put into editing these. I was lucky enough to have such beautiful photos to begin with, and now I have put a little bit of my own style into them! 

Check in tomorrow for drawing tips and ideas!

Now go make something, and enjoy the day!


Tuesday, September 28, 2010

Day One.

Today I decided that I needed a blog. Somewhere to share my creations and ideas. To pound out my thoughts and, if nothing else, a place to call "my own" in the internet world. So here I am, "blogging" as it's called.

Last night I finished sewing a bag that I can sort of call "my design". The basis of my idea came from this website with a cute pattern for a Buttercup Bag. I first attempted the pattern the other day and this is what I came up with.


What a fun little bag! So sweet and simple. Pleated in the front and back, and I added buttons to the sides just for fun.


After trying my hand at the Buttercup Bag, I decided I wanted to change it up a bit. Here is the end result.


I changed the shape, took out two pleats, and added a ruffle embellishment with a fabric flower. I still have some tweaking to do, but it was fun to add a little flair to an already great bag!
Interested in the fabric flower? You can make your own by following this great tutorial. Super cute and easy as pie!

Now I'm off to go work on a special drawing that I will feature in one of my upcoming posts. Oh, and to take care of my squawking baby who just woke up from her nap. I love being a mommy!

Now go make something, and enjoy the day!